
Installing a ceiling hoist in your garage can significantly enhance your ability to store bulky items like bicycles, kayaks, or seasonal equipment, freeing up valuable floor space. With the right preparation and careful installation, a garage ceiling hoist can be a reliable and convenient storage solution. This step-by-step guide provides clear instructions to help you safely and effectively fit a ceiling hoist in your garage.
Preparing Your Garage for Ceiling Hoist Installation
Before beginning the installation process, it’s essential to assess your garage ceiling’s structure to ensure it can support the weight of the hoist and the items you plan to lift. Most residential garages have ceiling joists spaced 16 to 24 inches apart, and these joists are typically sturdy enough for standard hoist systems. Use a stud finder to locate these joists and mark their positions, as the hoist must be securely anchored to them rather than just the drywall or ceiling panels.
Next, clear the area of any obstructions or items that might interfere with the installation process. Make sure the ceiling height provides enough clearance for the items you intend to hoist and for safe operation of the hoist mechanism. If your garage ceiling has insulation or other materials that could hinder installation, consider removing them or adjusting your plan accordingly.
Finally, gather all necessary tools and equipment before starting the installation. Common tools include a drill, screwdriver, measuring tape, ladder, wrench, and safety gear such as gloves and goggles. Having everything on hand will streamline the process and minimize disruptions, ensuring a smooth and safe installation experience.
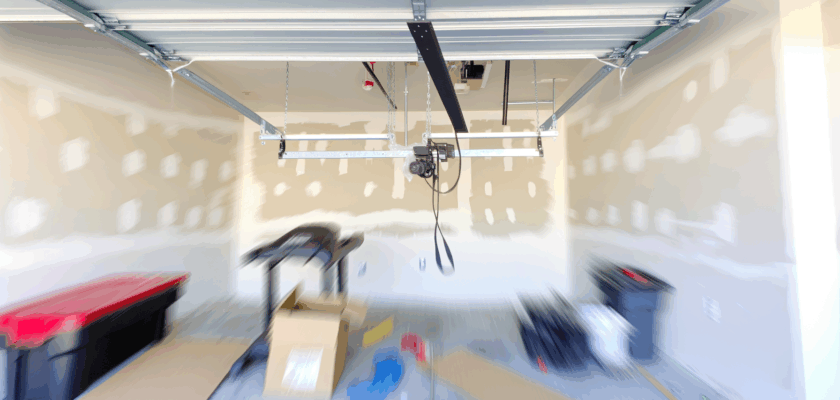
Installing the Ceiling Hoist: A Step-by-Step Process
Begin the installation by carefully measuring and marking the points on the ceiling joists where the hoist mounting brackets will be attached. Double-check all measurements to ensure the brackets are evenly spaced and aligned, which is crucial for the hoist to operate smoothly and bear load evenly. Use a pencil to mark drilling spots clearly.
Next, drill pilot holes into the marked joist areas to make it easier to screw in the mounting hardware. Attach the mounting brackets securely using lag screws or bolts provided with the hoist kit, ensuring they are tightly fastened to support the anticipated weight. It’s important to use hardware rated for the load capacity specified by the hoist manufacturer.
Once the brackets are installed, assemble the hoist mechanism according to the manufacturer’s instructions. This usually involves attaching pulleys, cables, and the lifting platform or hooks. Test the hoist by lifting a light load first, checking for smooth operation and stable anchoring. Make any necessary adjustments before proceeding to lift heavier items.
Fitting a garage ceiling hoist is a practical project that can maximize your storage space when done with proper preparation and care. By following these steps to prepare your garage and install the hoist correctly, you ensure both safety and functionality. Whether you’re storing equipment or freeing up floor space, a ceiling hoist is a smart addition to any garage setup.